GET STARTED
Quick start
Create your first 3D model from one image and learn the main workspace areas.
Last updated: 2026-08-20
Complete an image-to-3D task in a few minutes. Prepare a reference with a complete subject, clear silhouette and simple background.
Before you begin
- Use a current Chrome, Edge or Safari with WebGL enabled.
- Prepare a JPG, PNG or WebP image no larger than 6 MB.
- Sign in so the task and its result can be saved.
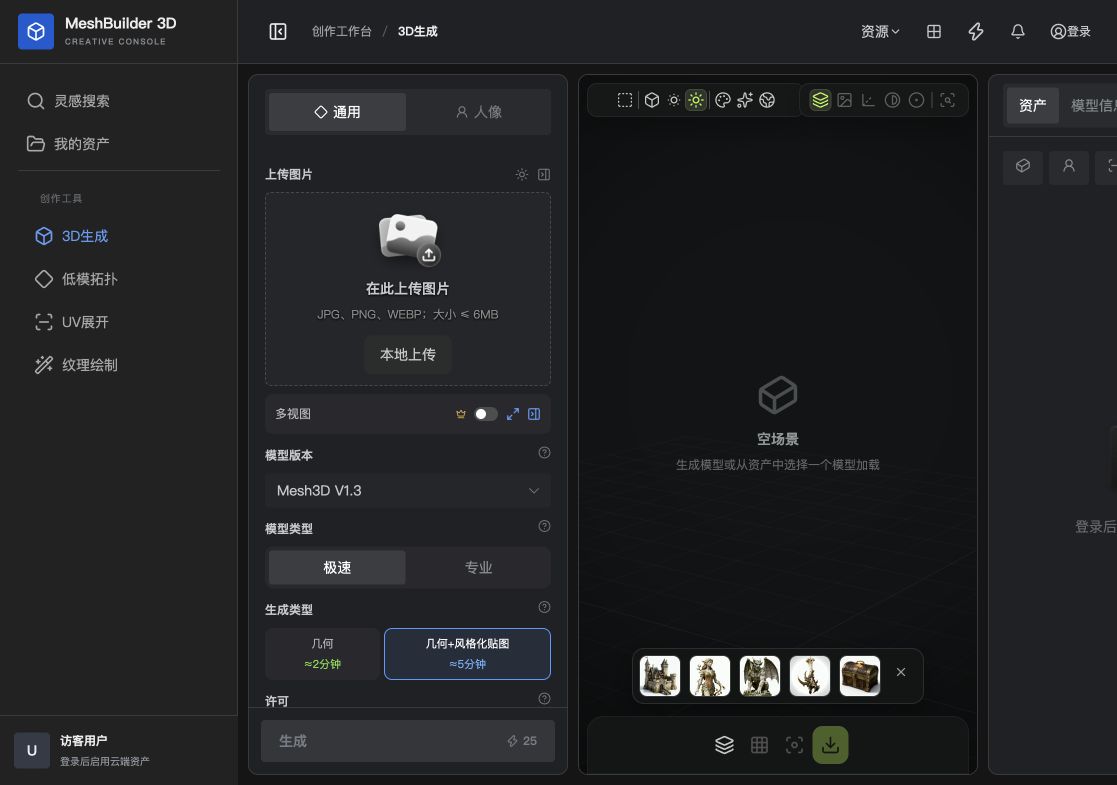
Create your first model
- Open 3D generation
Choose 3D generation from the left navigation.
- Upload a reference
Drop an image into Upload image or choose a local file.
- Choose a model mode
Start with Mesh3D V1.3 and Fast; use Pro when you need more detail.
- Choose the output
Geometry creates the mesh only; Geometry + stylized texture also creates a viewable texture.
- Submit
Check the displayed credit cost and select Generate. The result appears in the central preview and your assets.
Inspect the result
Drag to rotate the model. Use solid, wireframe, unlit and realistic lighting modes to inspect its silhouette, base, back and small structures.
- Check overall proportions against the reference
- Inspect hidden areas for malformed geometry
- Check seams, color and detail
- Confirm the polygon count fits the target platform
Learn what each setting does and how to improve results.
→